User Management
User Management
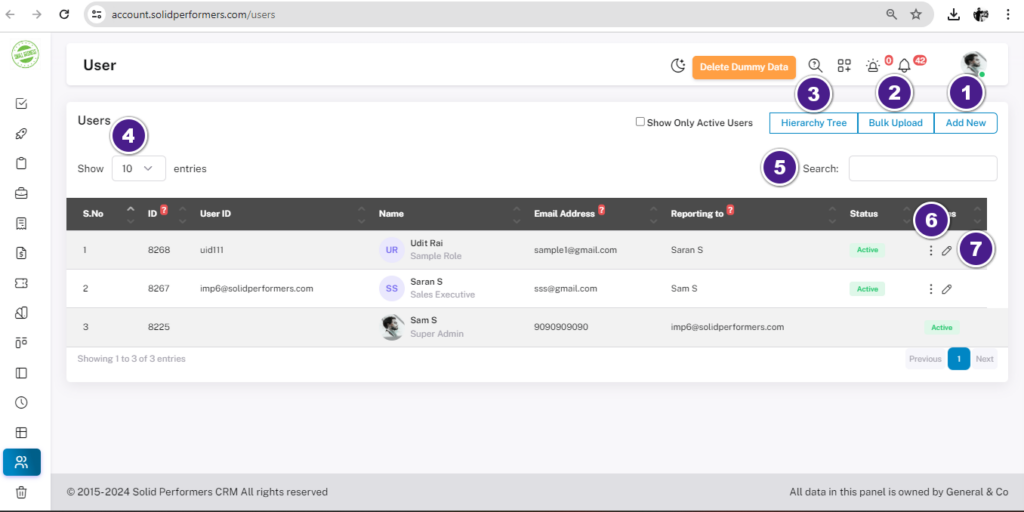
In User Management you can see all the users in one list page and there you can able to manage all the users.

User Management List Page
Path :- https://account.solidperformers.com/users
- To manually add new users, click on “Add new”. For more details, click here.
- For bulk user upload, click on “Bulk Upload”. For more details, click here.
- Click on the Hierarchy Tree to see the flow chart of the users. For more details, click here.
- If you have more than 10 users, click on “10” to view more than 10 users on the list page simultaneously.
- Utilise the search box to find users by typing their username.
- Click on the “Three dots” to view details, ban users, or delete the particular user. For more details, click here.
- Click on the “Pencil icon” to edit the user.
1. Add New User

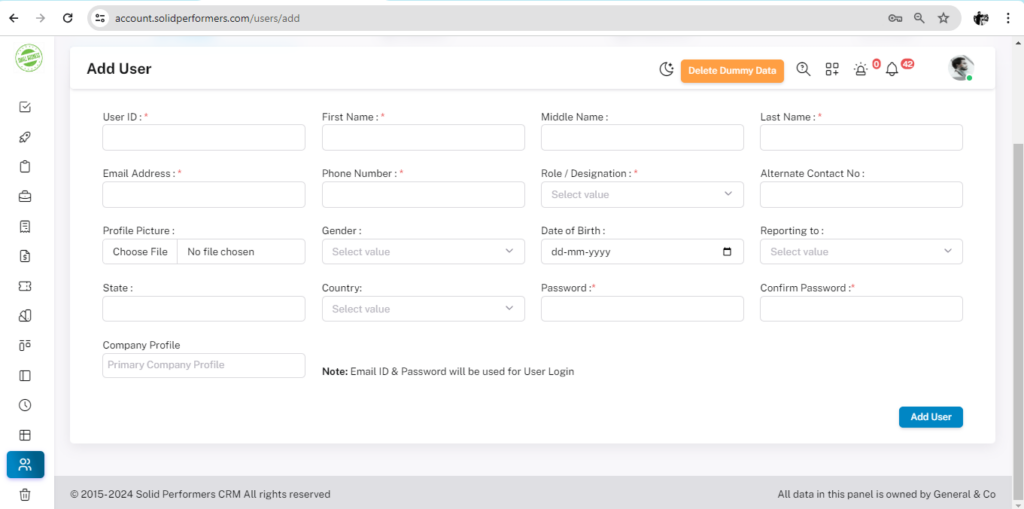
The above image you will get after you click on the “ADD NEW USER”. The fields which represents as “*’ it means those fields are mandatory to be filled.
1.1 User ID: [Enter User ID (e.g., 01)]
1.2 First Name: [Enter User’s first name]
1.3 Middle Name: [Enter User’s middle name (optional)]
1.4 Last Name: [Enter User’s last name]
1.5 Email Address: [Enter User’s email address] (mandatory)
1.6 Phone Number: [Enter User’s Phone Number]
1.7 Roles/Designation: [Select User’s Roles/Designation]
1.8 Alternative Number: [Enter User’s alternative number if required]
1.9 Profile Picture: [Choose User’s Profile Picture]
1.10 Gender: [Select User’s gender]
1.11 Date of Birth: [Select User’s Birth date, month, and year]
1.12 Reporting: [Select to whom the User will report]
1.13 State: [Enter User’s state]
1.14 Country: [Select User’s country]
1.15 Password: [Create User’s password]
1.16 Confirm Password: [Confirm User’s password]
1.17 Company Profile: [Select User’s company profile (optional)]
1.18 Click on “Add User” to create the user.
2. Three dots

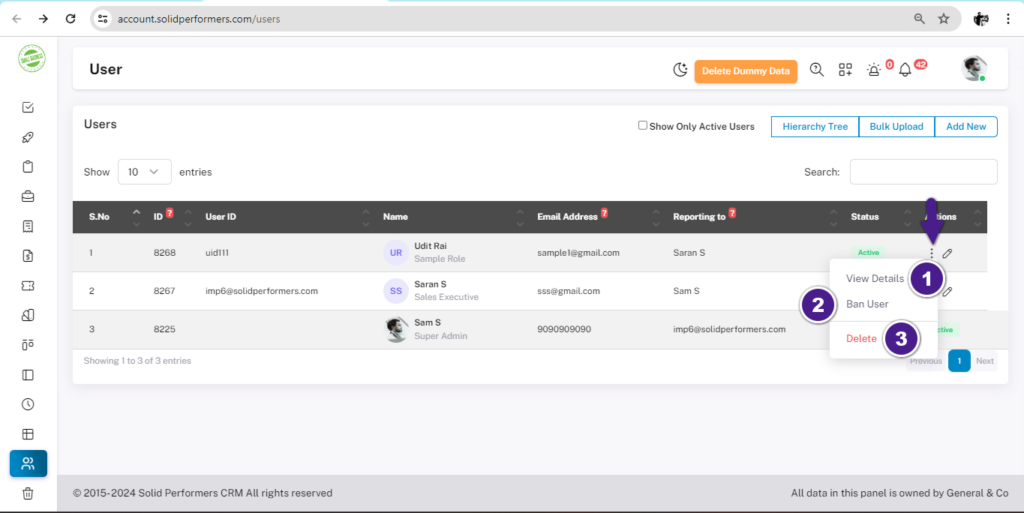
In the Above Image we can see after clicking on the “Three dots” ➖
2.1 View details – In view details we will get to see the overall details of a user with his/her Profile picture.
2.2 Ban user- After clicking on ban user that user won’t no longer can access his/her account of CRM. Later on you can also activate the user.
2.3 Delete- After clicking on delete that particular user won’t be able to access his/her account of CRM and in the User module list page also we won’t be able to see that particular user after deleting it
Using “Add new” button , you can create user manually.
3. Hierarchy Tree

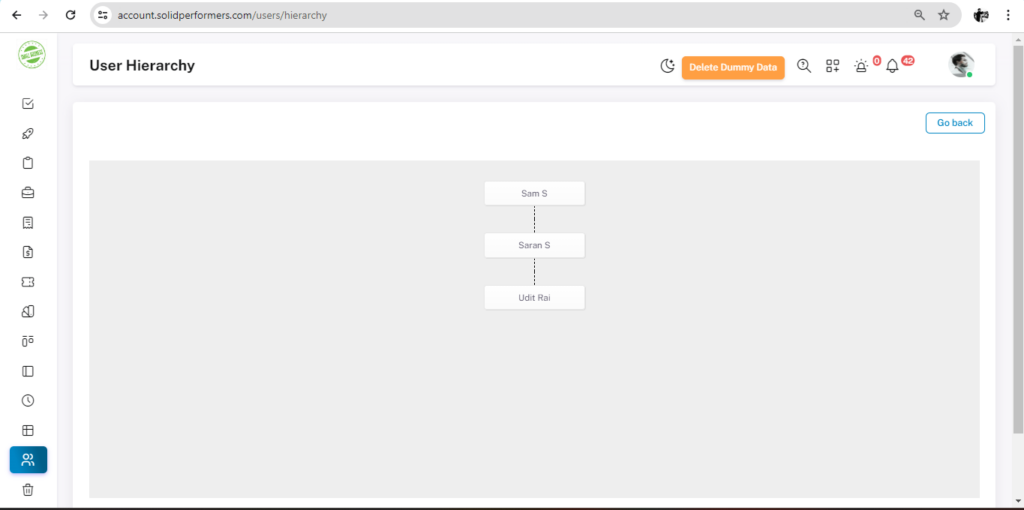
Under Hierarchy Tree you will get this page in that you will get the flow chart of the User’s to whom they’re reporting to.
While adding the user’s details there is a field name as “Reporting to” there you will get the dropdowns of the rest user’s name and you can select to whom that particular person is reporting to.
