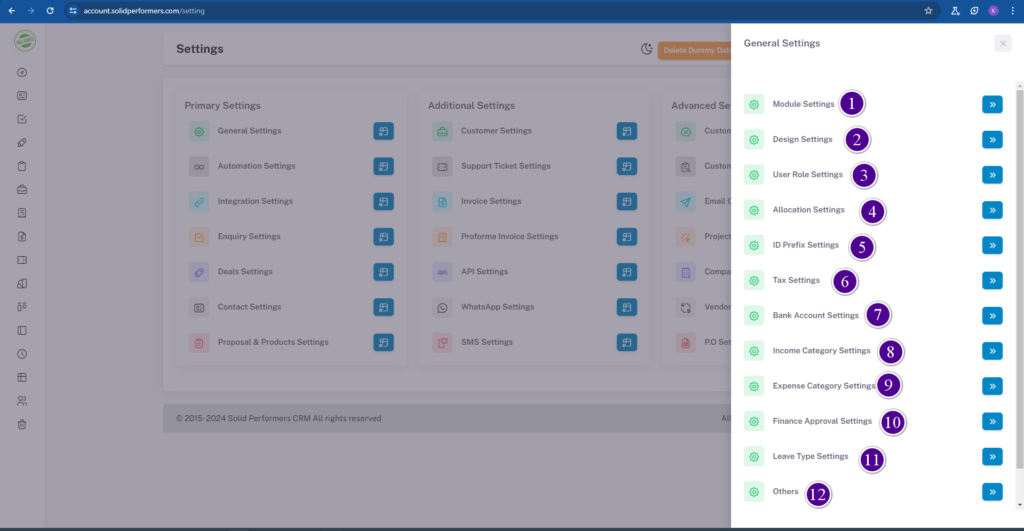
General Settings
1. Module Settings
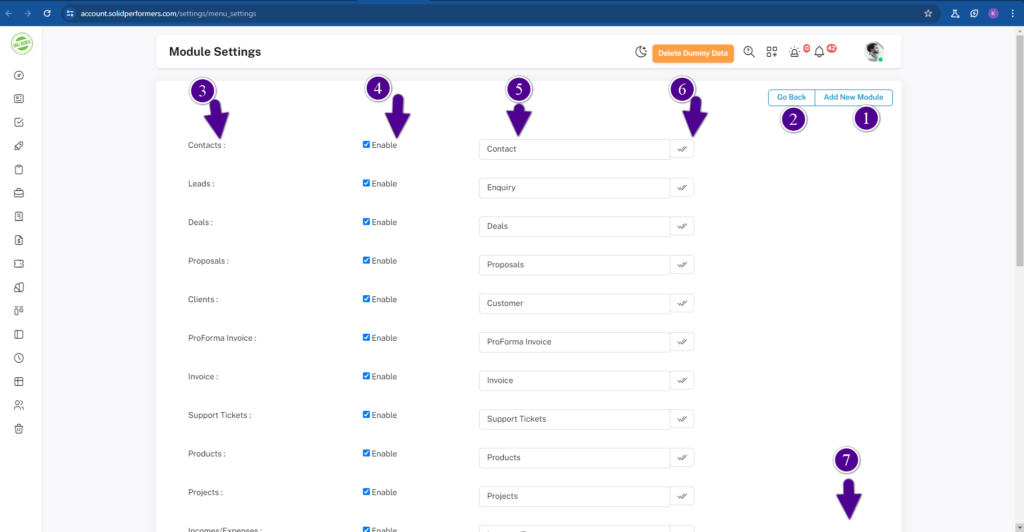
- Using this “Add New” button, you can incorporate the new module.
- Using the “Go Back” button, you can return to the previous page.
- The column below contains a list of module names.
- Using this “Check Box” button, you can enable or disable the modules.
- Using this box, you can rename the module names.
- Using this “Double Right” button, you can save the renamed module name.
- Scroll down the page, and you’ll find an “Update Module Settings” button. Use this button to save all the details of the changes you made on this page.
2. Designe Settings
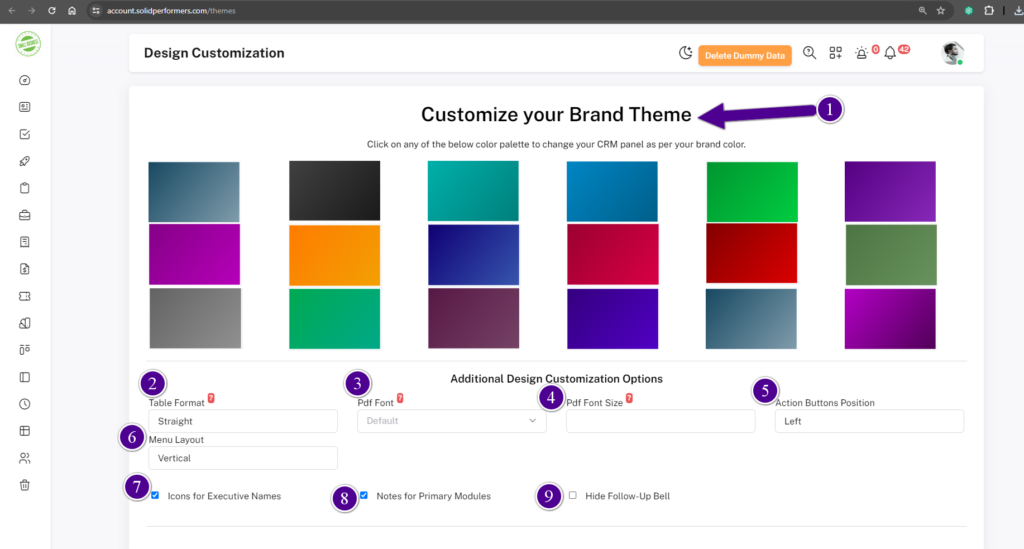
- Click on any of the below color palette to change your CRM panel as per your brand color.
- You can modify the List page header names of the lead, deal, and client module lists using the “Table Format” options. These options allow you to choose whether the header stays fixed in its position while scrolling or moves along with the content.
- You can specify a particular font for the content when downloading data or anything in PDF format within the CRM using the “PDF Font” Box.
- When downloading data or anything in PDF format within the CRM, if you need to set a specific font size for the content, you can do so using the “PDF Font Size” Box.
- You can adjust the position of the action buttons on all modules, whether you prefer them on the left, right, or both sides, using the “Action Buttons Position” box.
- With the “Menu Layout” box, you have the option to change the menu list position, whether you prefer it horizontally or vertically.
- By checking the “Icons for Executive Names” box, you can display either the name or an icon below the executive details on the list page.
- When you check the “Notes for Primary Modules” box, you’ll have the option to add notes to specific lead or data details in all primary modules.
- Utilizing the “Hide Follow-Up Bell” checkbox in the CRM panel allows you to hide the notification bell icon if needed.
3. User Role Settings
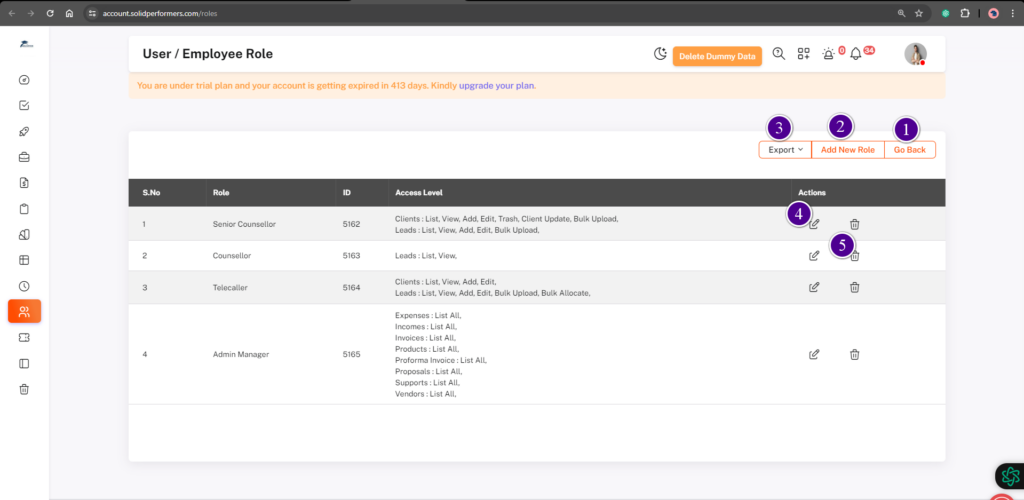
1. With the “Go Back” Button, you can easily redirect to the previous page.
2. Utilize the “Add New” button to create new user roles.
3. By using the “Export” Button, you can download the user roles in CSV format and also print them.
4. The “Edit” Icon allows you to modify the access level for specific user roles, determining the type of access they should have.
5. By utilizing the “Trash” button, you can delete specific user roles.
4. Allocation Settings
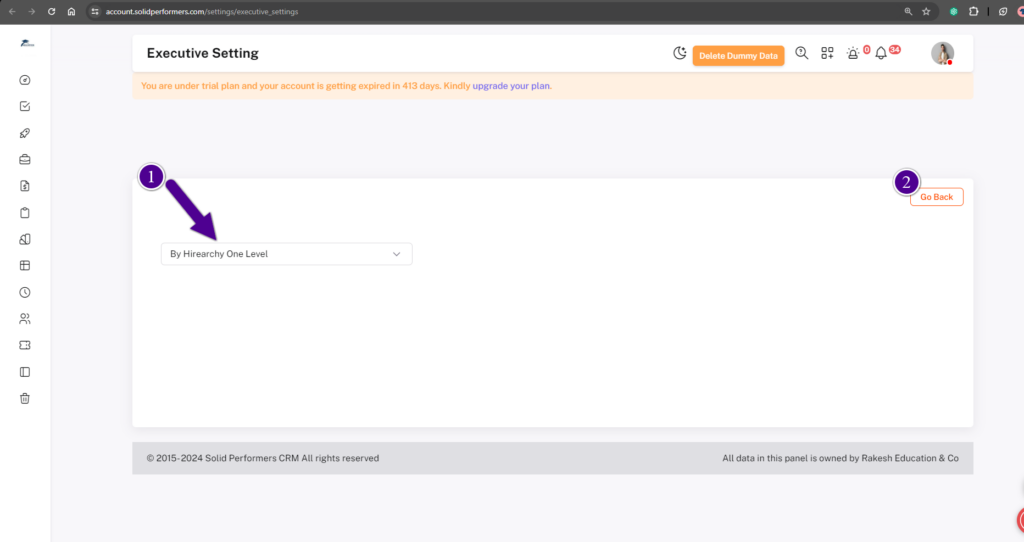
1.In this box, you’ll find options such as:
-
- By Hierarchy One Level: Using this option, you can grant access at the first level of the hierarchy tree.
- By Hierarchy All Sub Levels: This option grants access to all sub-levels within the hierarchy.
- To Team: Grants access to the entire team.
- To All: Grants access to everyone.
- None: No access granted.
2. Using this “Go Back” button, you can be redirected to the previous page.
7. Bank Account Settings
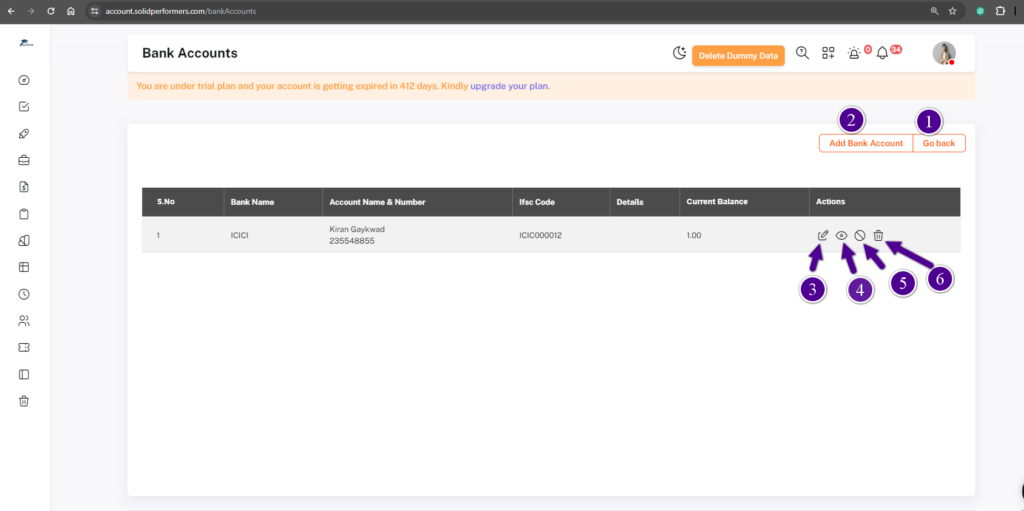
1. Using the “Go Back” button, you can return to the previous page.
2. By clicking the “Add Bank Account” button, you can add new bank accounts.
3. Clicking the “Edit” icon allows you to edit the bank details.
4. Utilizing the “View” button enables you to see more detailed information.
5. By clicking the “Circle“, you can toggle the activation status of the particular bank.
6. Using the “Trash” icon, you can delete the specific account details.