Contact Management
Contact List Page
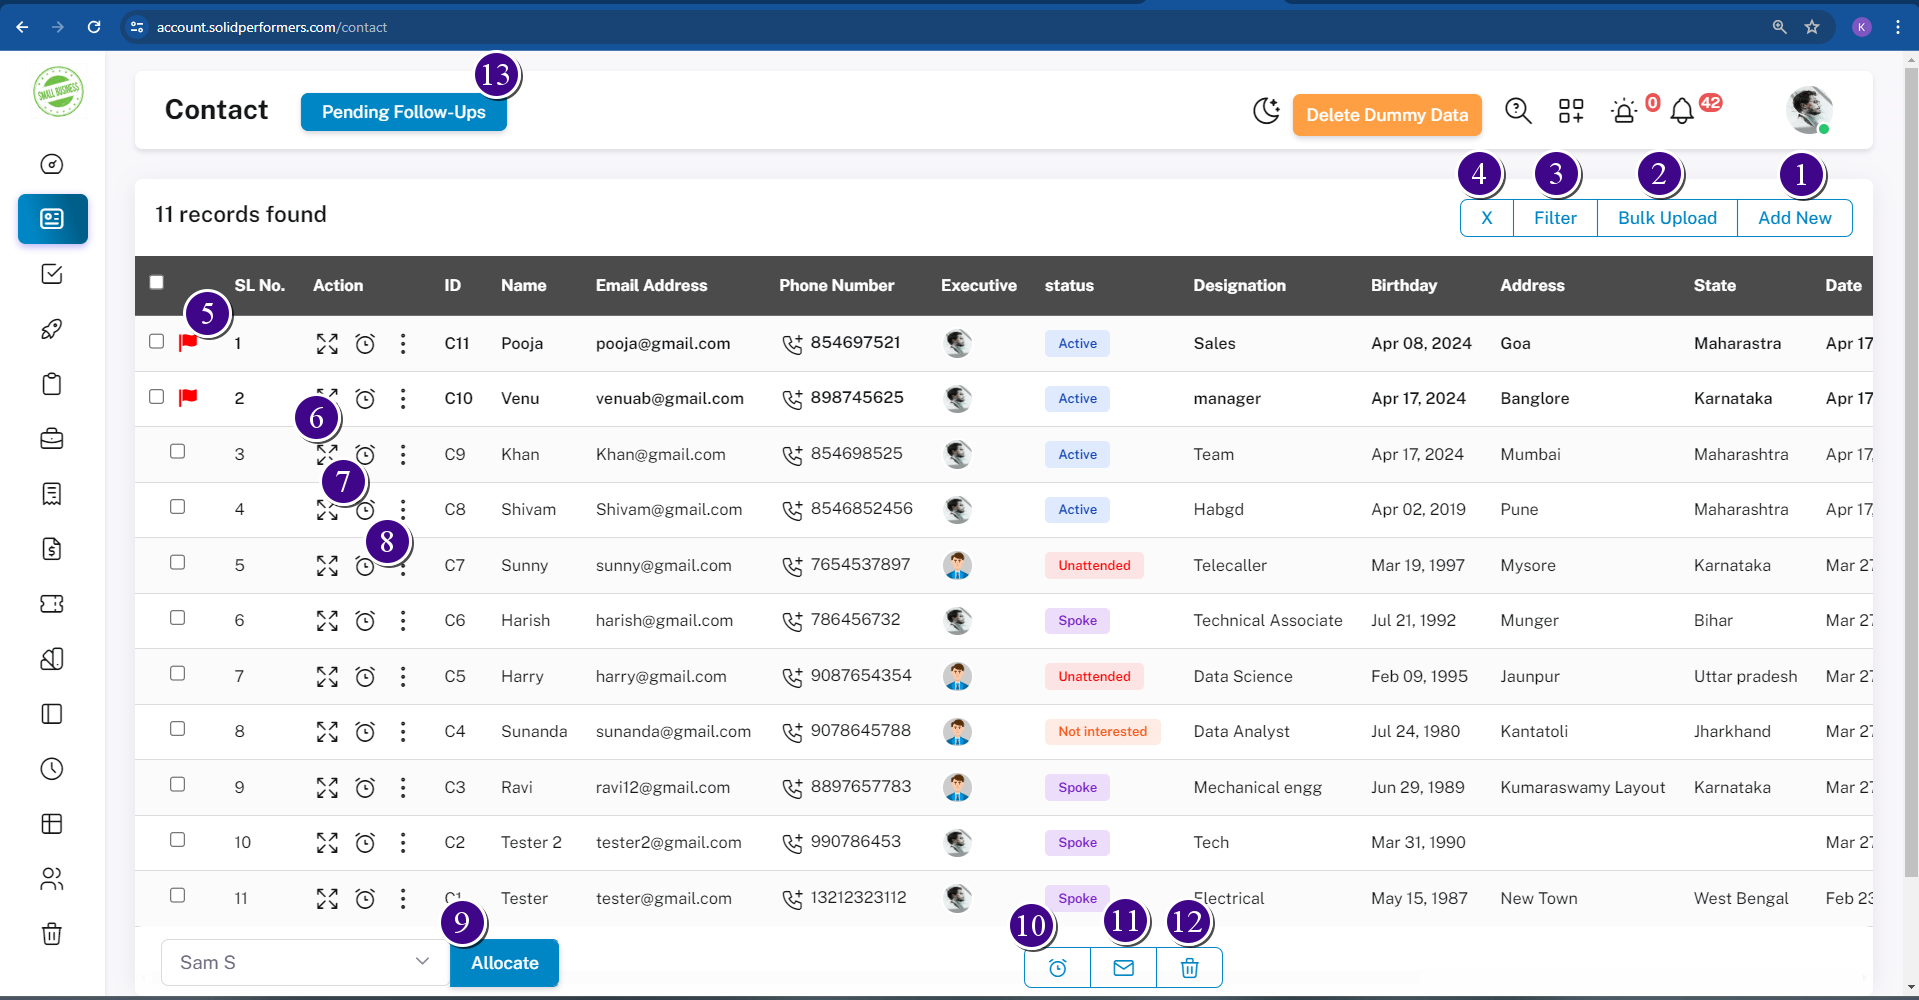
1. Add New
Using this “Add new” button, you can add contact manually.
2. Bulk upload
Using the “Bulk Upload” button, you can add contacts up to 5,000 at a time. For more details click here.
3. Filter
With the “Filter” button, you can easily find a contact by searching for their name, email, phone number, and more.
4. x
Using the “x Icon” button mean’s Auto-sourced contacts flagged; click to remove flag in bulk. Only applies to auto flagged contacts, not manually flagged ones.
5. Flag Icon
The “Flag” button puts the contact at the top, making it easy to find. This could be for new or important contacts. It’s like marking a message as important in WhatsApp, making sure the contact is easy to find.
6. View
Using the “View icon” button, you can access more details about the contact. For details click here.
7. Clock Icon
Using the “Clock Icon” button, you can add follow-ups to specific contacts.
8. Three Dots Icon
Using the “Three Dots Icon”, you can edit or modify data. For more details click here.
Update Multiple Leads Quickly
9. Allocate
Using the “Allocate” button, You can select and allocate or assign contacts to any executives.
10. Clock Icon
Using the “Clock Icon” button, you can add a follow-up to one or multiple contacts at a time.
11.EMailBox Icon
Using the “EMailBox Icon” button, you can send a mails to one or multiple contacts at a time.
12. Trash Icon
Using the “Trash Icon” button, you can delete one or multiple contacts by selecting them and clicking on this trash button.
13. Pending Follow-Up
You can access pending follow-up contacts by clicking the “Pending Follow-Up” button.