Self Help Knowledge Base
Inbuilt Tools
Web Lead Forms
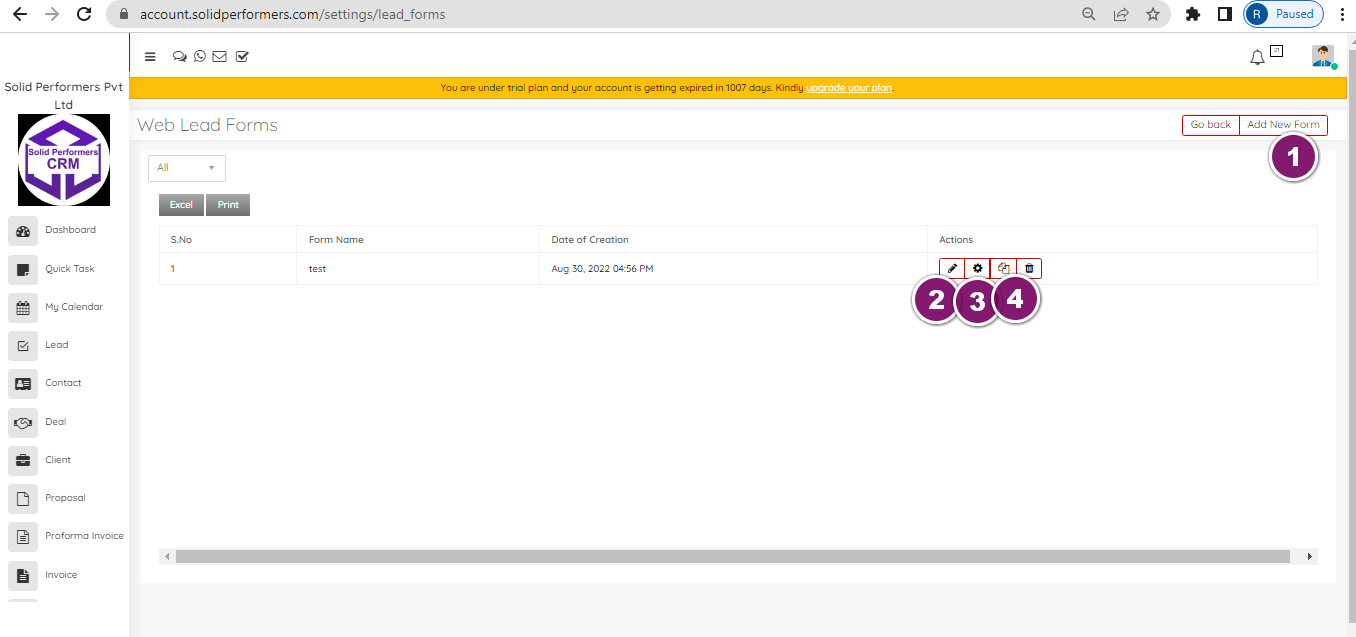
https://account.solidperformers.com/settings/lead_forms
- You can add new form.
- You can edit and update the new form.
- You can also do the setting as per your requirements.
- You can also duplicate the form if you need the same.
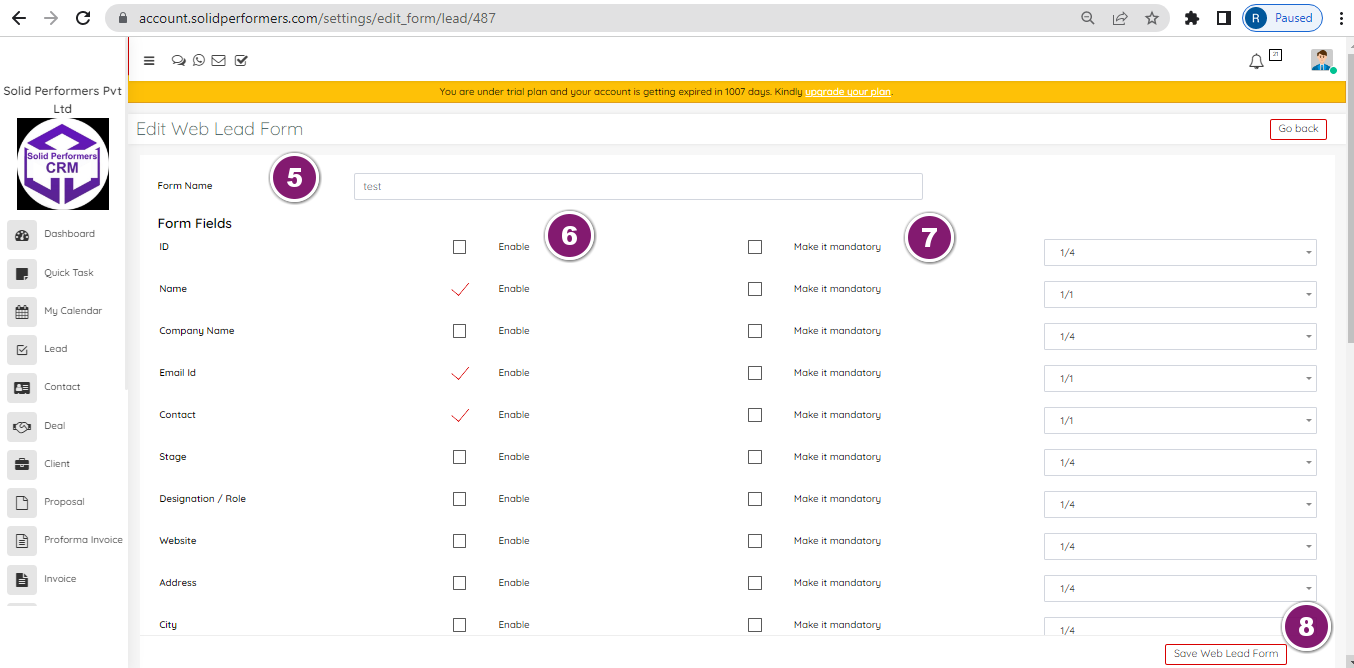
- Add a form name as per your requirement.
- You can enable and disable the form field’s.
- You can make any form mandatory.
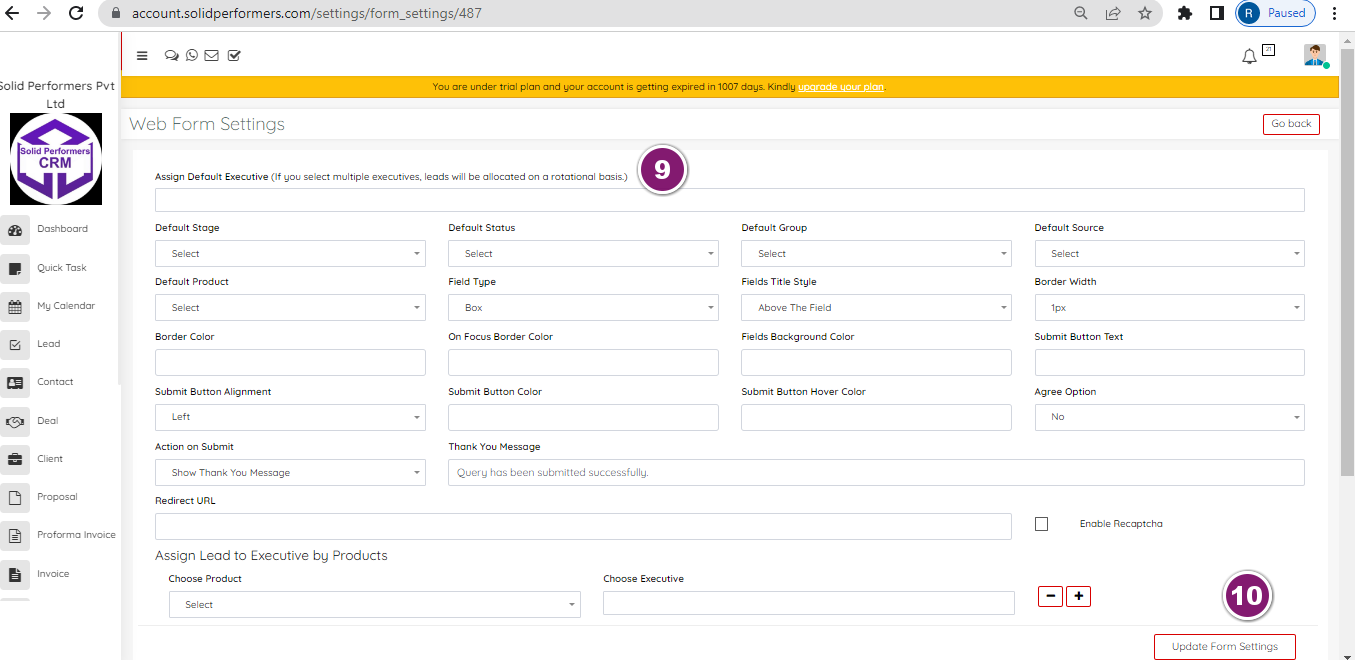
- You can set the form.
- You can assign default executive for these leads.
- And you can update the form settings from here.
Web Contacts Forms
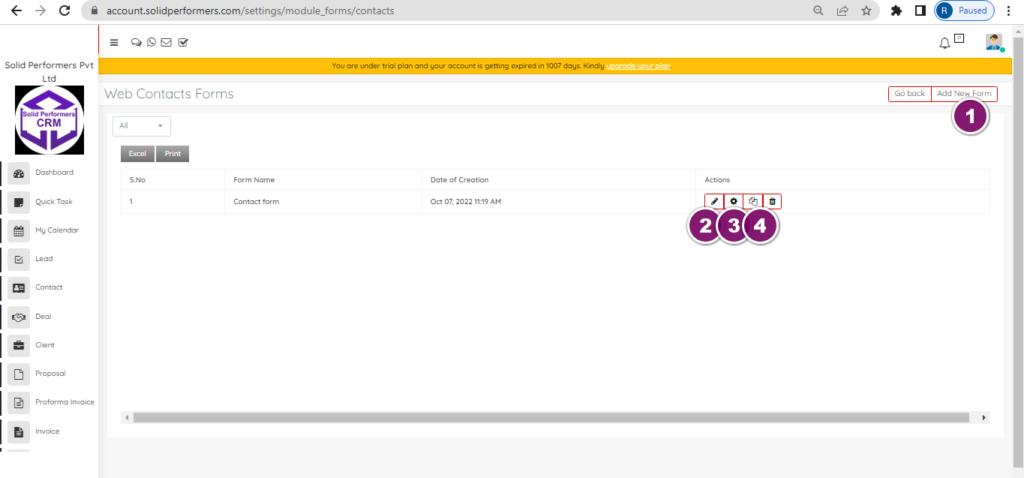
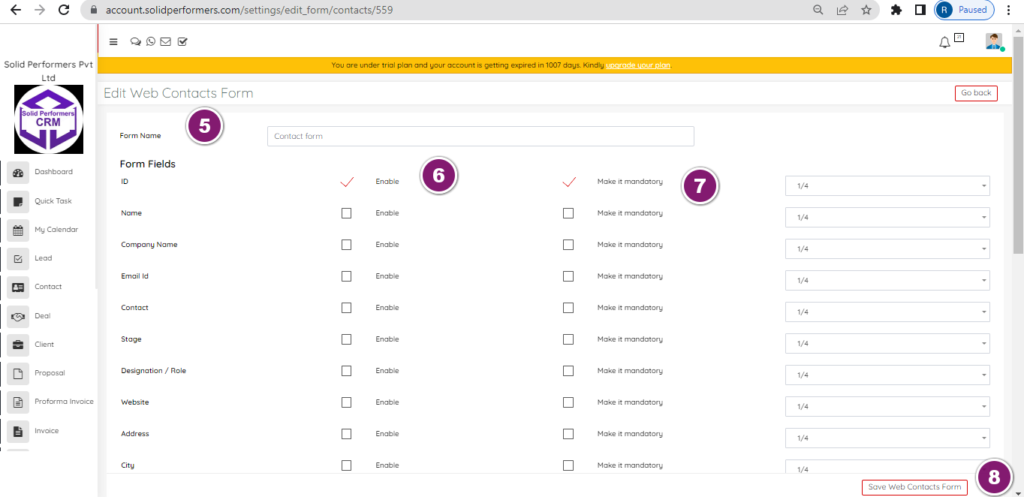
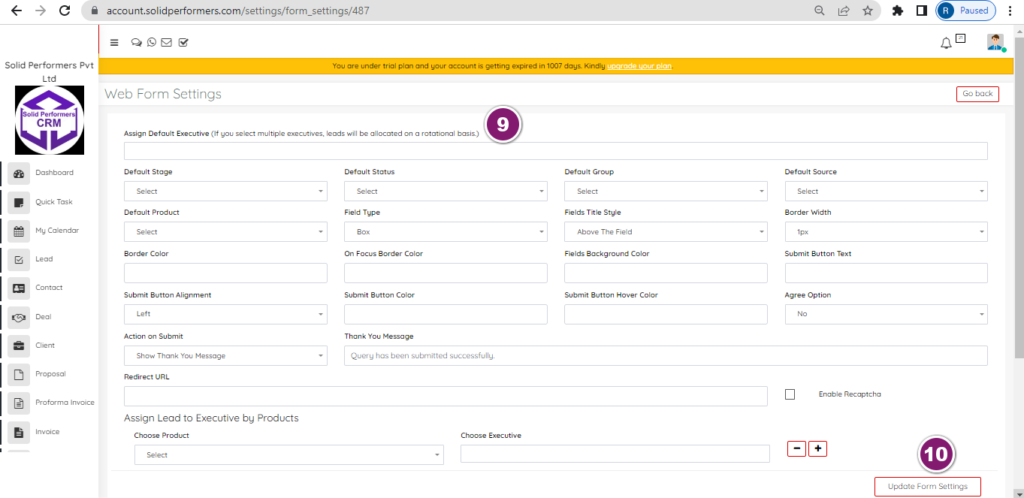
https://account.solidperformers.com/settings/module_forms/contacts
- You can add new form.
- You can edit and update the new form.
- You can also do the setting as per your requirements.
- You can also duplicate the form if you need the same.
- Add a form name as per your requirement.
- You can enable and disable the form field’s.
- You can make any form mandatory.
- You can set the form.
- You can assign default executive for these leads.
- And you can update the form settings from here.
Support Forms
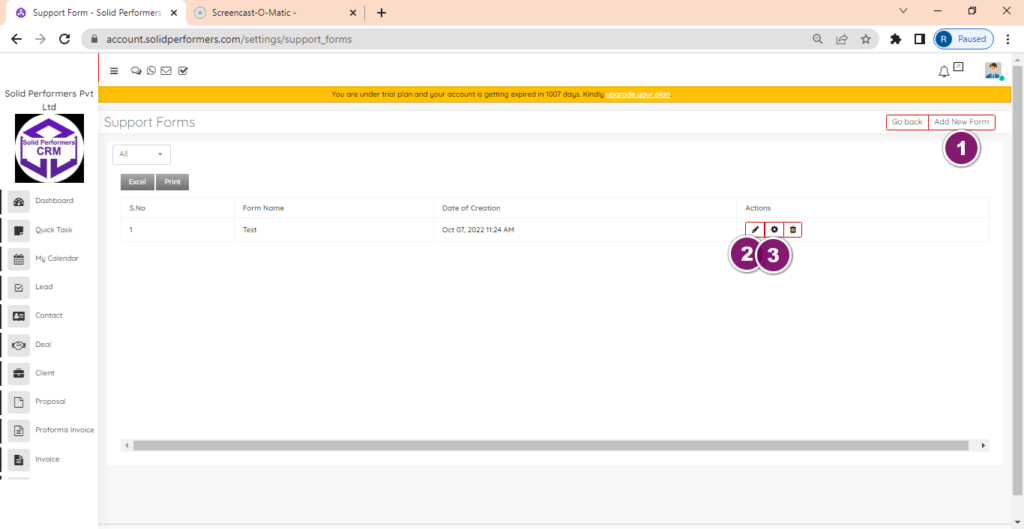
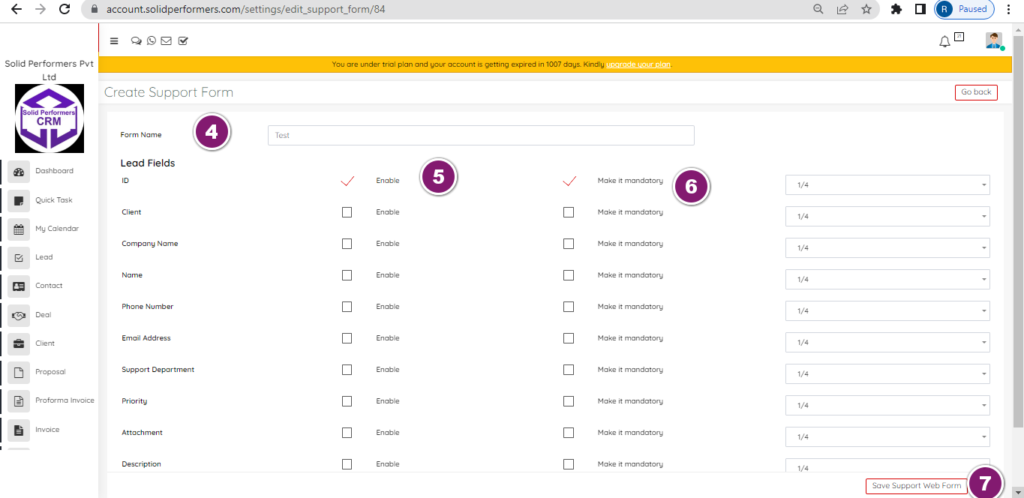
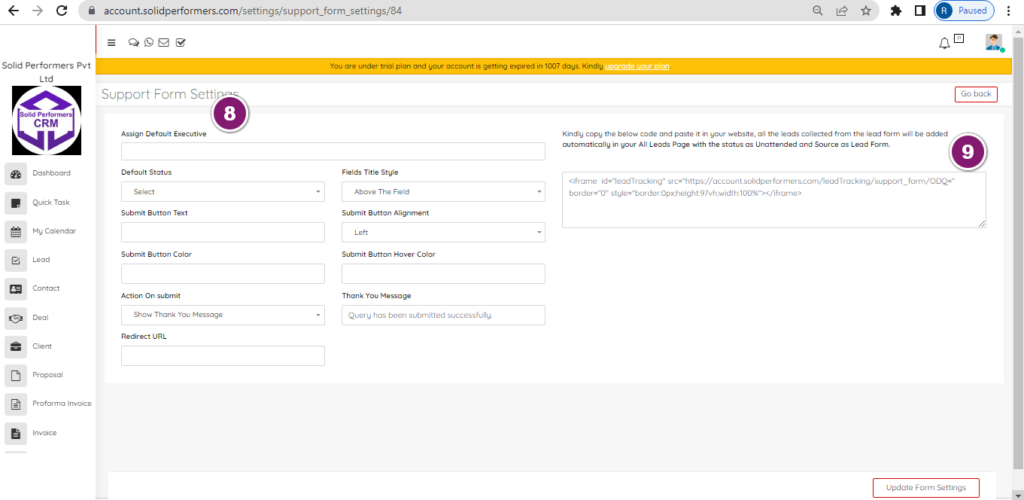
https://account.solidperformers.com/settings/support_forms
- You can add new form.
- You can edit and update the new form.
- You can also do the setting as per your requirements.
- Add a form name as per your requirement.
- You can enable and disable the form field’s.
- You can make any form mandatory.
- You can set the form.
- You can assign default executive for these leads.
- You have to copy the below code and paste it in your website, all the leads collected from the lead form will be added automatically in your All Leads Page.
Chatbots
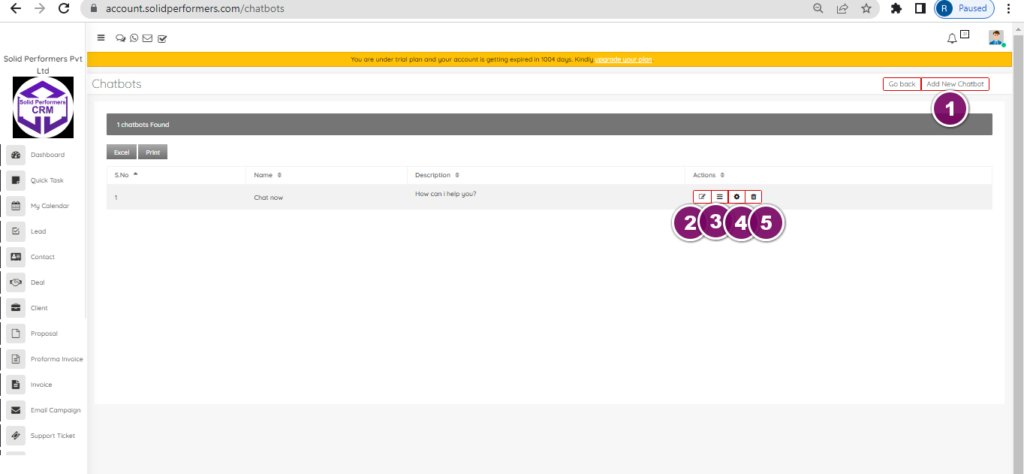
https://account.solidperformers.com/chatbots
- You can add new chatbot.
- You can also edit the existing chatbot.
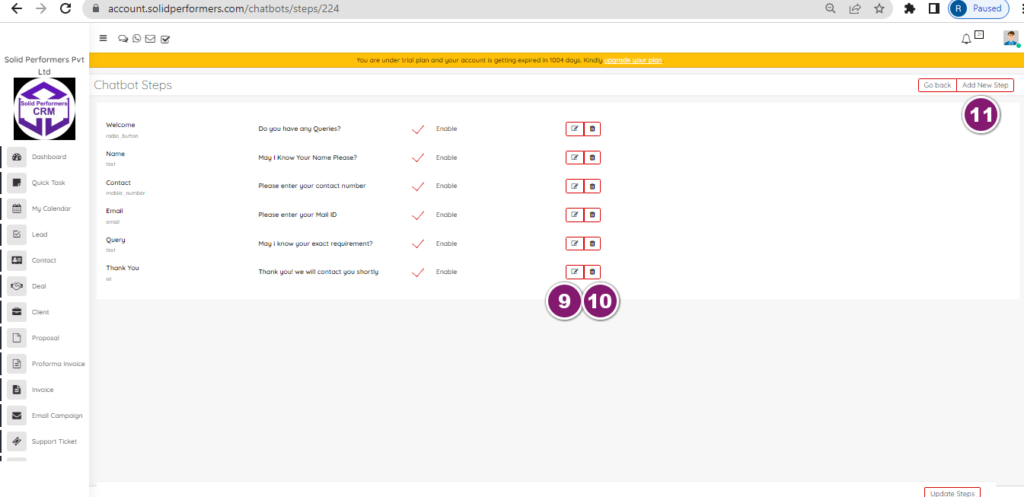
- You can add all the chatbot steps from here. Those steps will show you one by one doing the enquiry from the chatbot page.
- You can change the chatbot settings according to your requirements.
- You can also delete the existing chatbot.
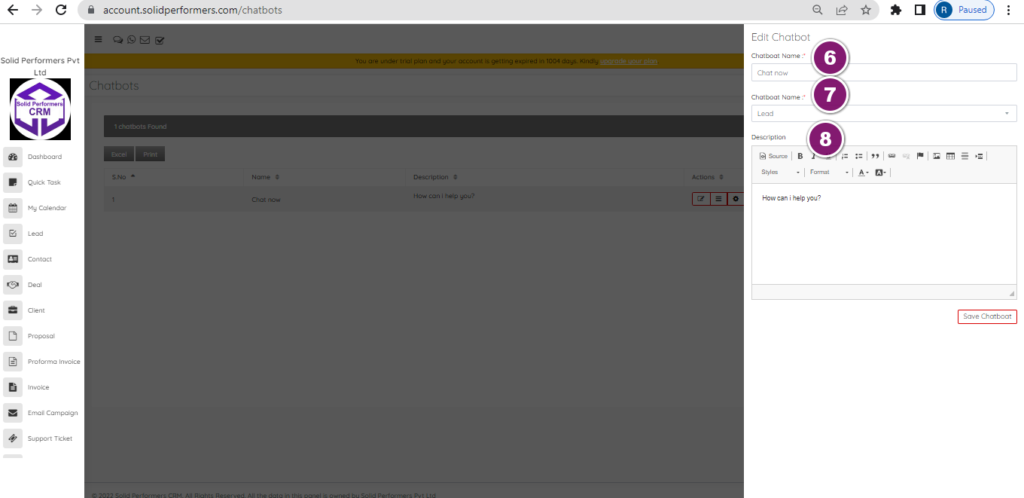
- Add your chatbot name here.
- Select the chatbot for Lead or support module, so that the enquiry will come to selected module.
- Add the description for chatbot and save it.
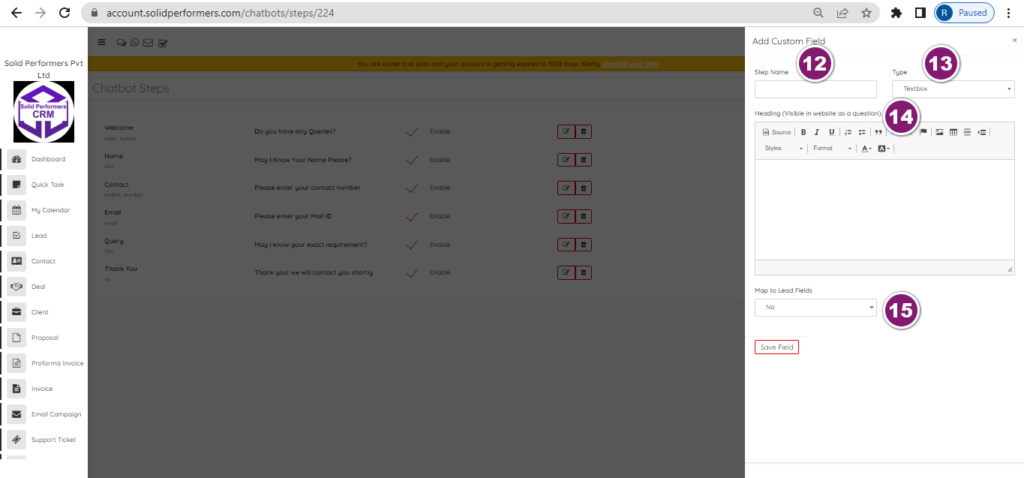
- .You can edit the existing chatbot steps.
- You can also delete the chatbot steps.
- You can also add new step as per your requirements.
- Add the step name.
- select the filed type.
- And you have to add heading from here and that will be visible in website as a question.
- You can also Map data to lead fields, once after selecting the mapping option, it will displays all lead/support module fields so that you can select respective fileds and you can map the data to module.
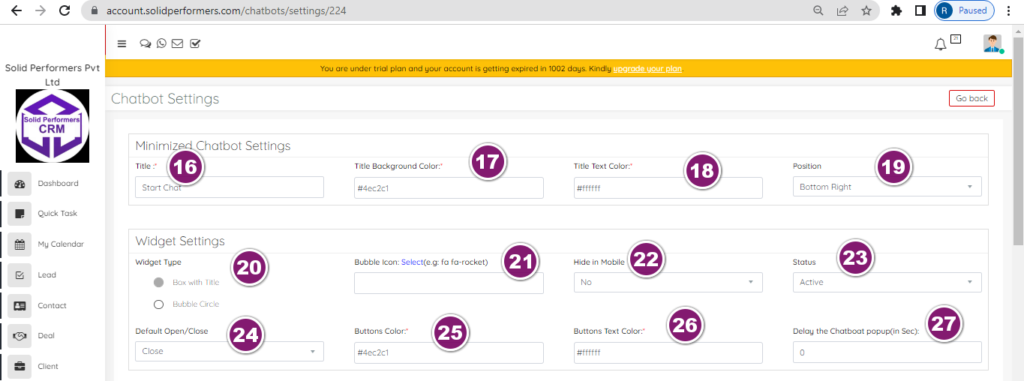
- We can do minimized chatbot settings from here and you can select the Title and it will displays as a icon in the website.
- You can select the Title Background Color as suitable for your website.
- You can also set the Title Text Color..
- You can also set the position for chatbot icon, based on this setting it will show your chatbot in the website.
- You can also set the Widget settings from here, select the Widget type from here, you will get 2 options here Box with Title and Bubble Circle, according to your you can set.
- You can also set the bubble icon and we have also given an option to set the icon directly from the fontawesome.com so that you can select any icon from there.
- You can hide/unhide the chatbot from mobile.
- You can also Active or inactive the chatbot status from website.
- You can also set by default it should be close or open.
- You can set the widget buttons color from here.
- You can set widget button text color.
- You can also set delay chatbot popup in seconds so, that it will appears in the screen according to the settings.
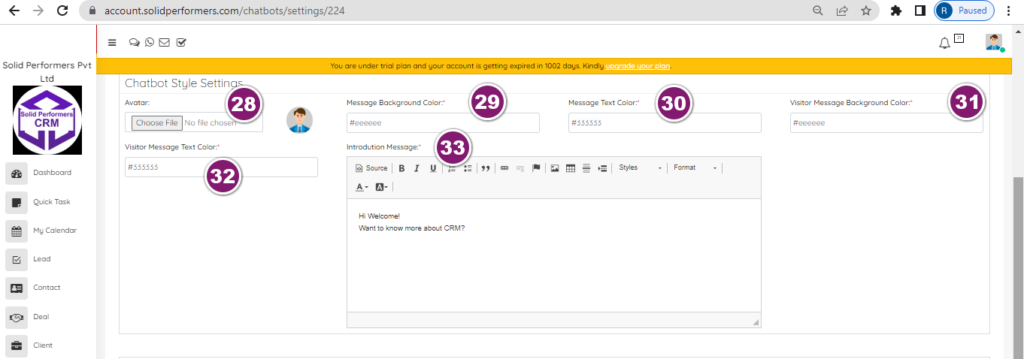
- We can also set chatbot style settings. and from here we can upload any Avatar so that it will displays as a user profile.
- You also set message background color.
- You can also set message text color from here.
- You can set visitors message background color.
- You can also set message text color..
- Add introduction message from here so, that will appear once after visitor opens the chatbot icon.
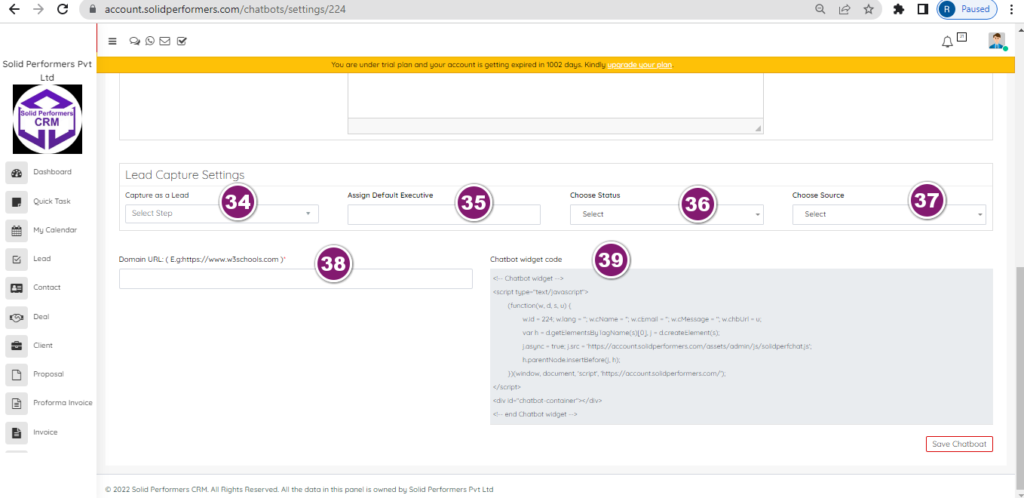
- We can also do the lead capture settings from here. So it will consider that selected step and it captures as a lead.
- You can also assign default executive for chatbot leads.
- Choose the default status of lead and it will show you the same status in the lead module.
- Choose the source as chatbot or as per your requirement so that, you can be able to find out these leads in the same source.
- Add your website domain name here to which your copy the chatbot code.
- Finally it will display a Chatbot Widget Code and you just copy the code and paste into your website header page or else ask your website developer to do it.
Add Lead Capture API
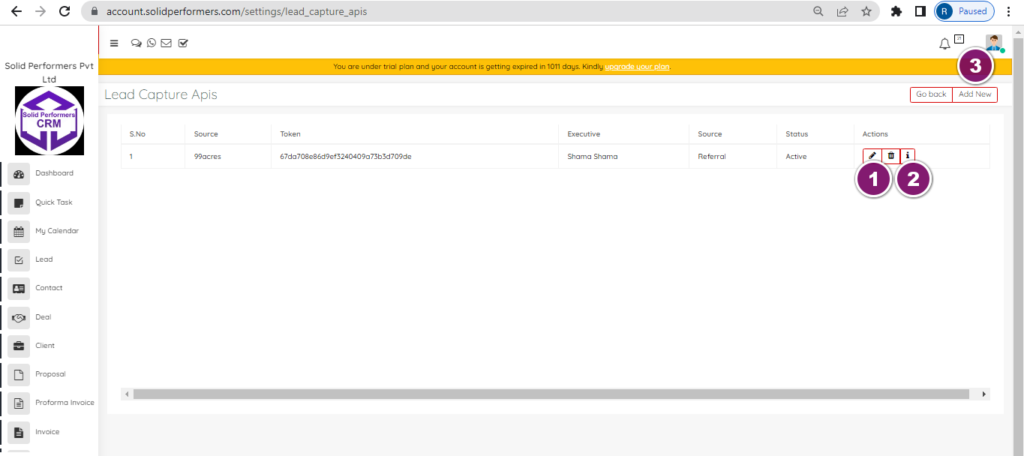
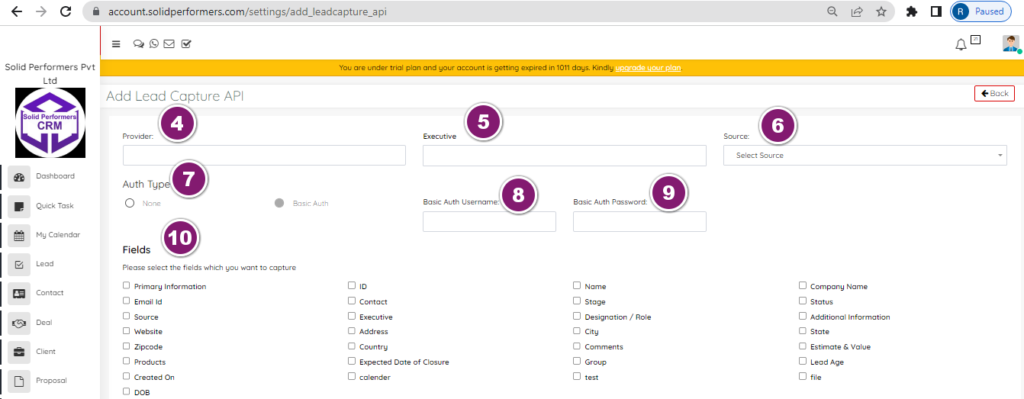
https://account.solidperformers.com/settings/add_leadcapture_api
- You can edit/delete the existing lead API Key.
- You can get the API details in Details tab
- You can also create multiple number of API keys.
- You have to add the provider name here.
- You have to select executive numbers here and you can also select multiple executive numbers, so that leads will allocate to those executives in Round Robin method.
- You have to select a source for these leads, so that you will get to know all the leads from this particular API.
- Select Auth type. If you select Basic Auth, it will provide you to add some credentials.
- You can add any Basic Auth Username here.
- You can add any basic auth password.
- Select the field parameters, select the fields which you want to capture the details.
- You can also Assign Lead to Executive by Products
- Select the duplicate options to receive the leads based on requirements.
Add Lead Retrieve API
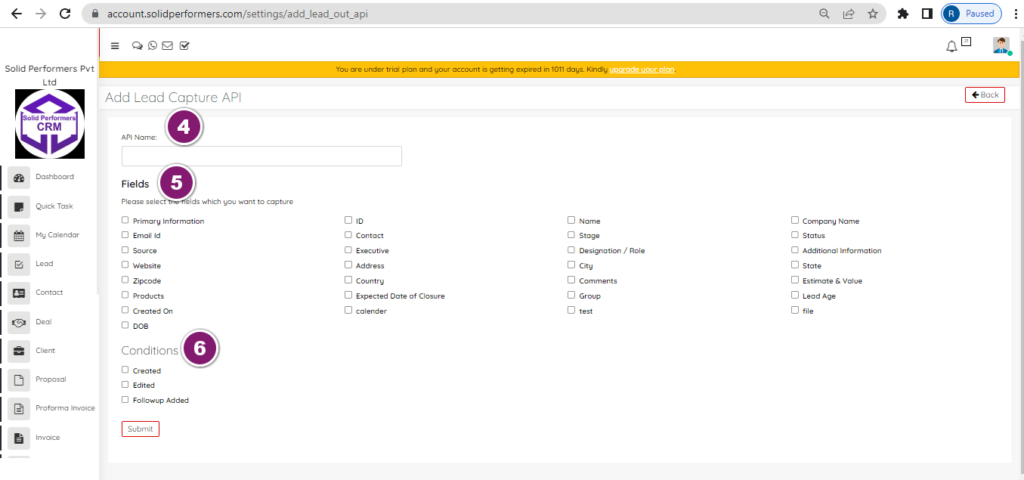
https://account.solidperformers.com/settings/lead_retrieve_apis
- You can edit/delete the existing lead API Key.
- You can get the API details in Details tab.
- You can also create multiple number of API keys.
- Add the API name.
- Select the field parameters, select the fields which you want to capture the details.
- Select the condition dap per requirements.